
What your shopper sees
On your product page the shopper sees your theme’s own buttons (Add to cart and Buy it now) and, in your brand colour, the Buy with COD button. Tapping it opens the order form right on the page, so the shopper never leaves the product. In the picture below, the COD button sits below the theme’s buttons, which is the default placement. The extra box above it is a bundle offer; you only see it if you have created one.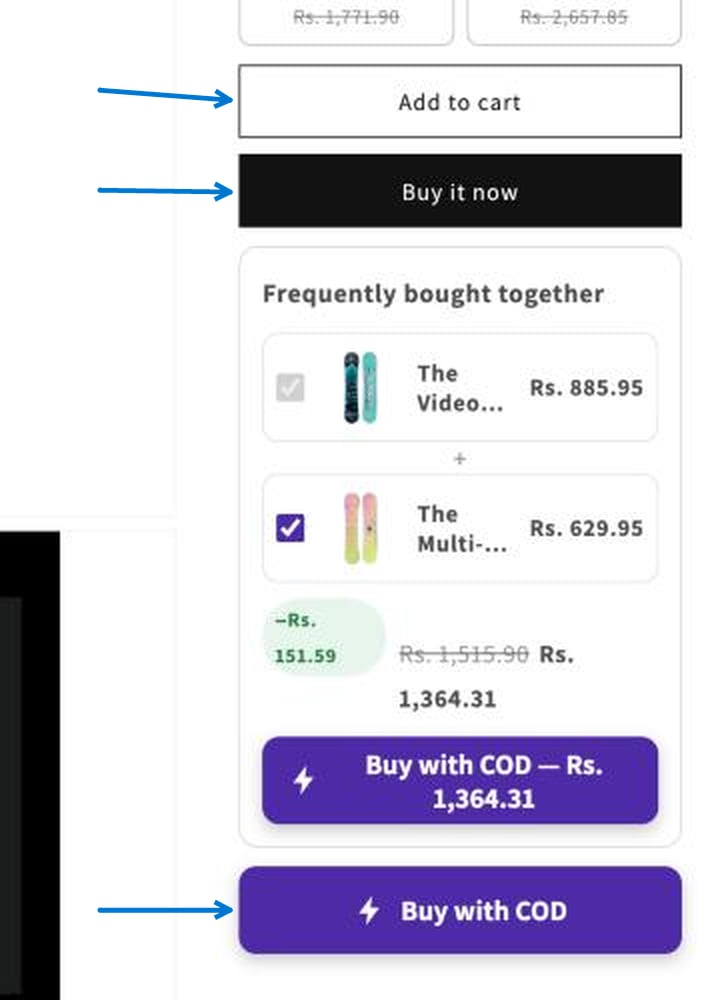
1. Style the COD button
Under COD button, set the text and look of the button:- Button label — the button text, up to 60 characters. Use
{total}to show the price, for example “Buy with COD — ”. - Subtitle (optional) — a short line under the label, up to 80 characters (for example “Pan India Supported”).
- Background, Text and Border — colours for the button.
- Border width, Corner radius, Text size and Height — drag the sliders.
- Shadow, Icon and Animation — pick a style from each list.
- Bold label and Full width — tick to turn them on.
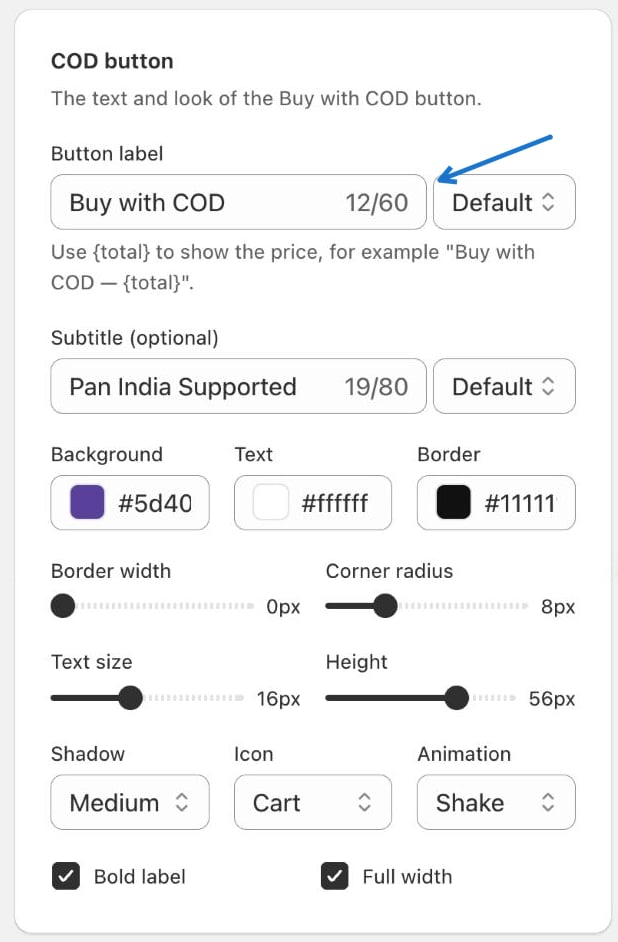
The Default menu next to a text field chooses which language you are editing the text for.
2. Choose the buttons on each page
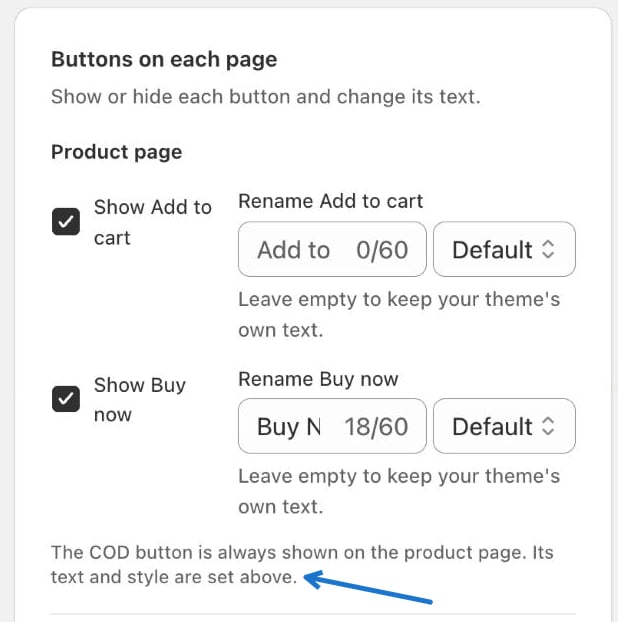
Buttons on each page lets you show or hide each button and change its text. Leave a rename field empty to keep your theme’s own text.Product page
- Show Add to cart and Rename Add to cart
- Show Buy now and Rename Buy now
Cart page and cart drawer
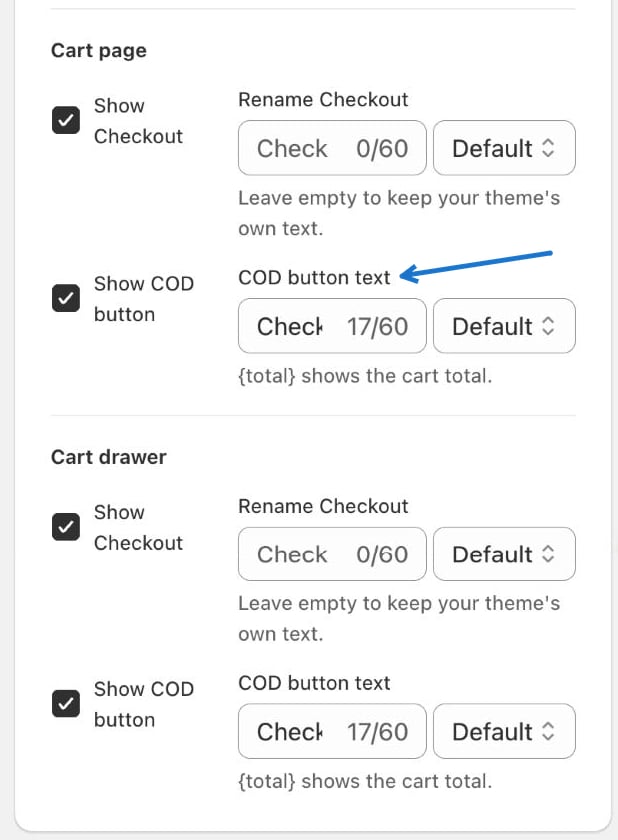
For each of them you can:- Show Checkout and Rename Checkout — keep or rename your theme’s checkout button.
- Show COD button and COD button text — add a COD button next to checkout.
{total}shows the cart total.
3. Choose where the button sits
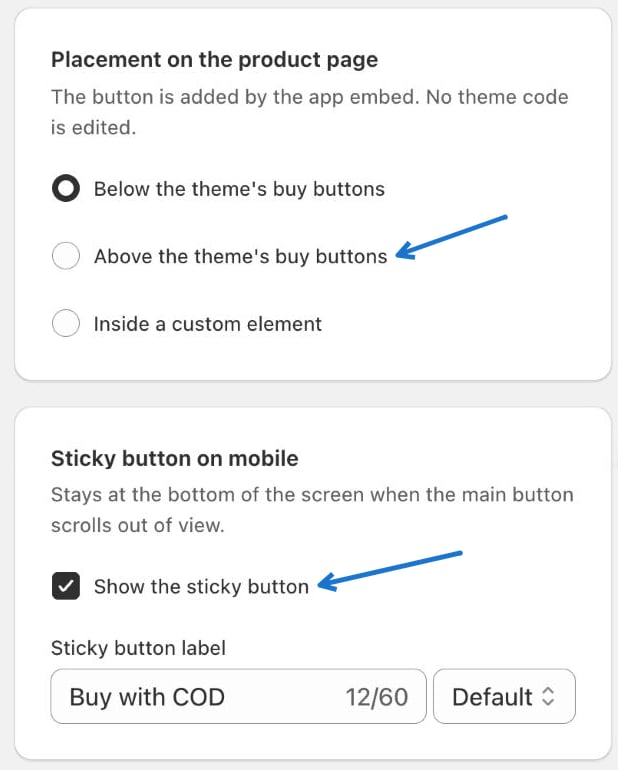
Placement on the product page decides where the COD button is added. It is added by the app embed, and no theme code is edited.- Below the theme’s buy buttons
- Above the theme’s buy buttons
- Inside a custom element
4. Quantity offer widget
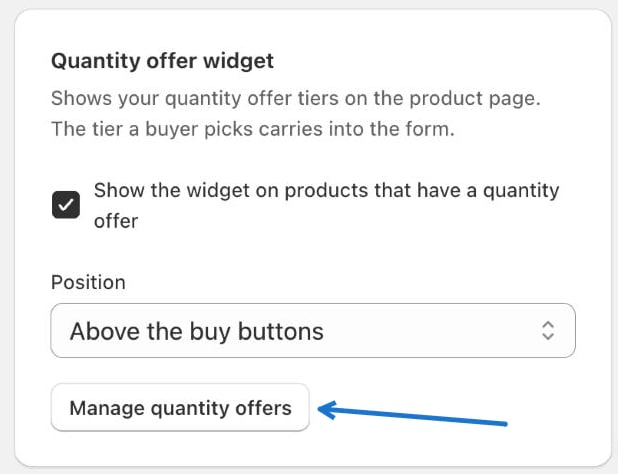
If you use quantity offers, Quantity offer widget shows your offer tiers on the product page. The tier a shopper picks carries into the form.- Tick Show the widget on products that have a quantity offer.
- Choose its Position, for example Above the buy buttons.
- Click Manage quantity offers to create or edit the offers themselves.
5. Advanced options
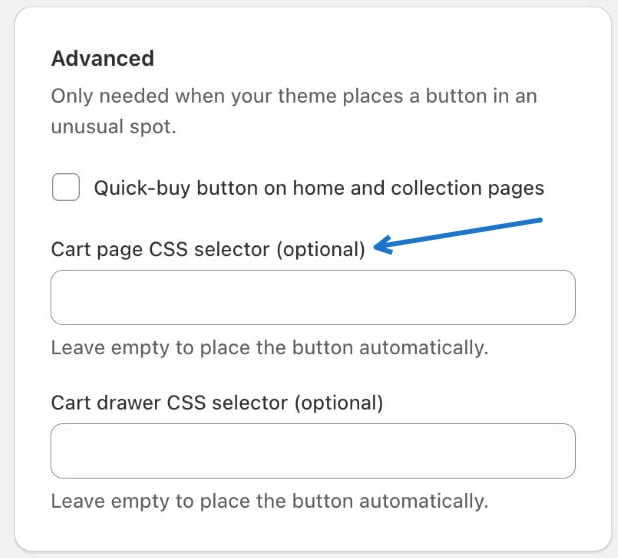
The Advanced card is only needed when your theme places a button in an unusual spot.- Quick-buy button on home and collection pages — adds a COD button to product cards.
- Cart page CSS selector and Cart drawer CSS selector — optional. Leave them empty to place the button automatically.
6. Check the preview
The Preview at the bottom shows how the product page buttons look with your changes, followed by the sticky button on mobile and the cart page.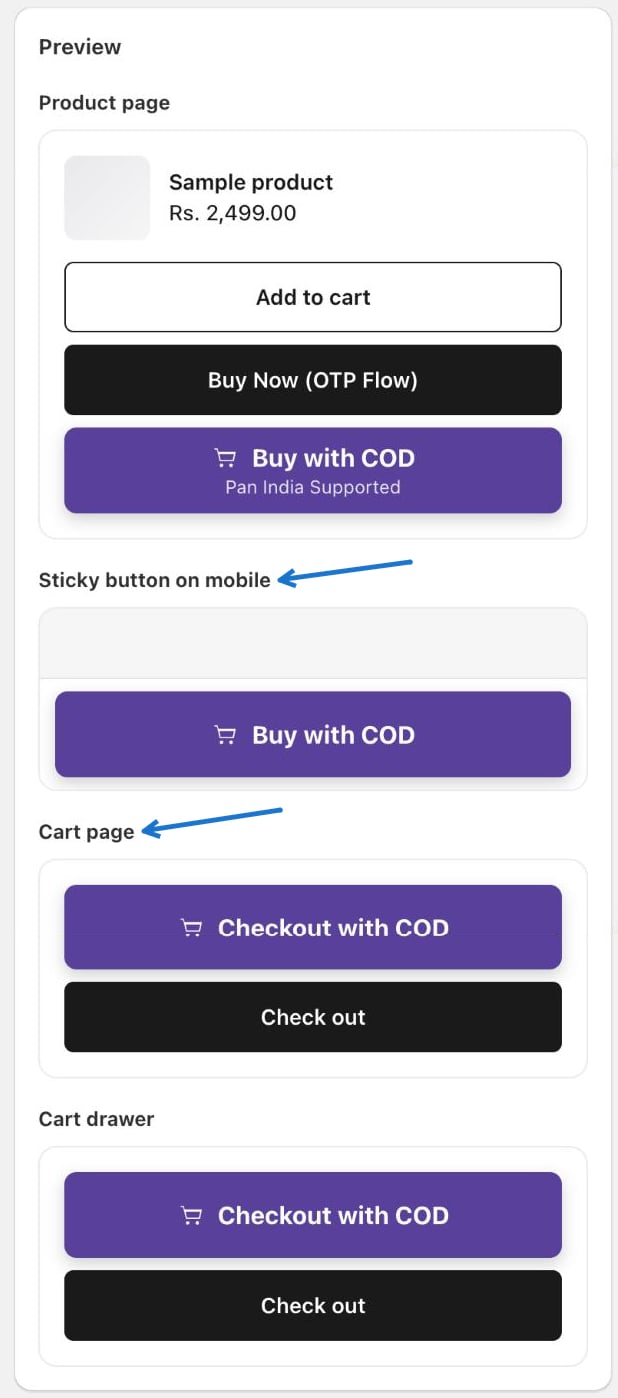
Next: Form designer
Choose the fields and style the form itself.
Back to Setup
Choose which pages and products get the COD button.