
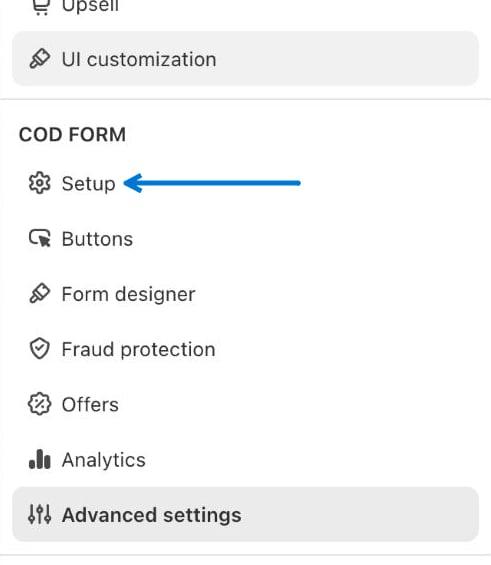
1. Check the app embed
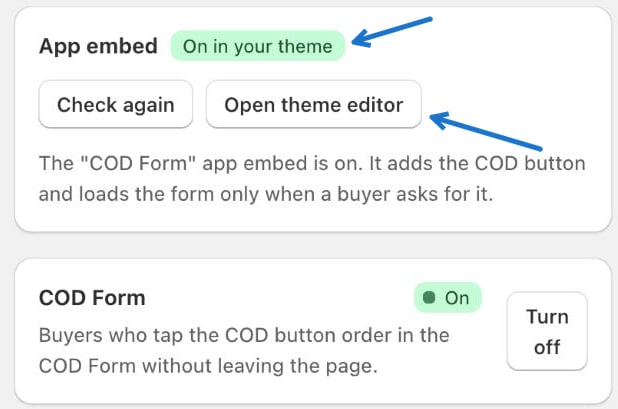
At the top of the page, the App embed card tells you whether the COD Form app embed is active in your theme. When everything is right, it shows On in your theme.- Check again re-checks your theme after you change something.
- Open theme editor opens your Shopify theme editor, where you can switch the COD Form app embed on.
2. Choose the form language
Under Form language, pick the language of the COD button, quantity offers, bundles, upsells and the whole order form. By default it uses Storefront language (default), so shoppers see the form in the language they browse your store in. You can also pick a fixed language, and you can edit every text in the Form designer → Texts tab.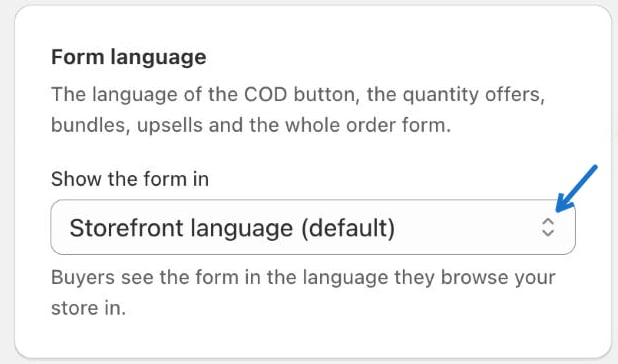
3. Set up phone verification (OTP)
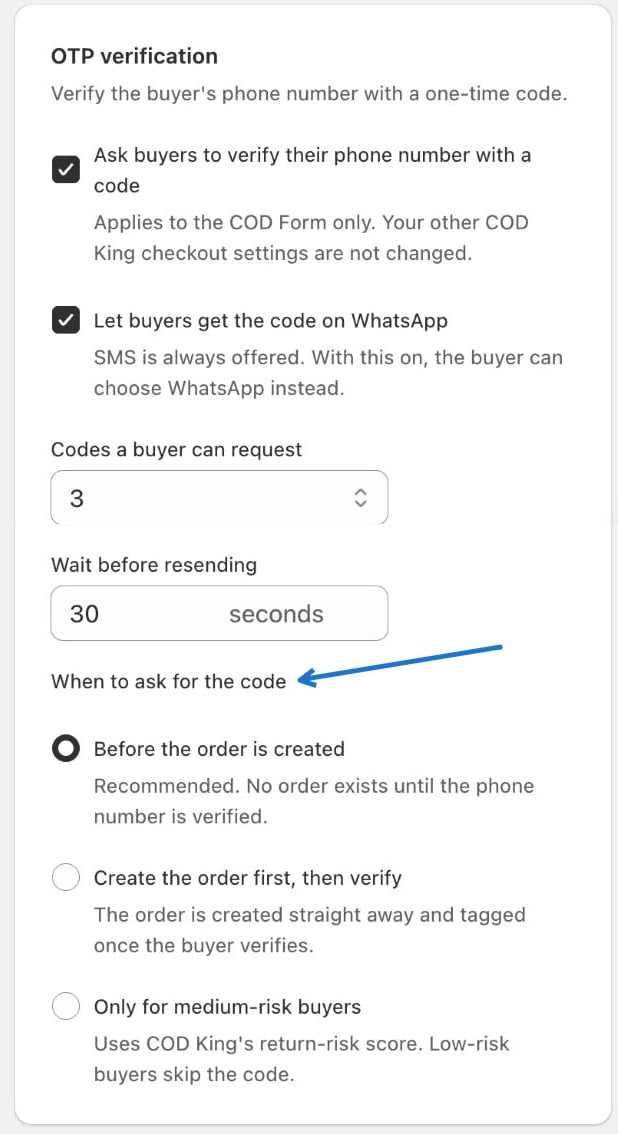
Verify the shopper’s phone number with a one-time code before the order is placed.- Ask buyers to verify their phone number with a code — turns verification on for the COD Form. It applies to the COD Form only; your other COD King checkout settings are not changed.
- Let buyers get the code on WhatsApp — SMS is always offered. With this on, the shopper can choose WhatsApp instead.
- Codes a buyer can request — how many codes one shopper can ask for.
- Wait before resending — how many seconds a shopper must wait before asking for a new code.
- Before the order is created (recommended) — no order exists until the phone number is verified.
- Create the order first, then verify — the order is created straight away and tagged once the shopper verifies.
- Only for medium-risk buyers — uses COD King’s return-risk score. Low-risk buyers skip the code.
What your buyer sees
With verification on and Before the order is created selected, the buyer enters a phone number and taps Continue. A Verify your phone number screen then asks for the 4-digit code that was sent to that number. The buyer can wait for the Resend code timer, ask for the code on WhatsApp, or tap Change number. Verify and continue moves on to the address form.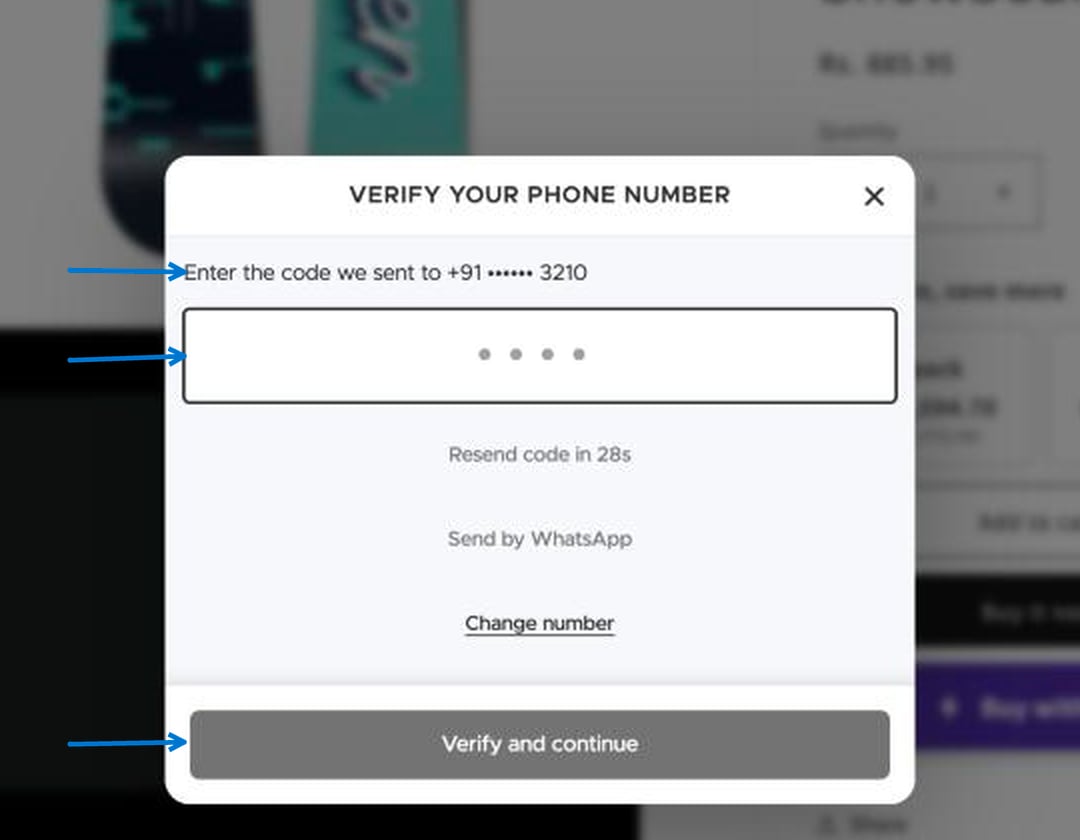
Changes you save here reach your storefront after a short delay. If the storefront still shows the old behaviour, click Resync settings to storefront at the top of this page, then reload the product page.
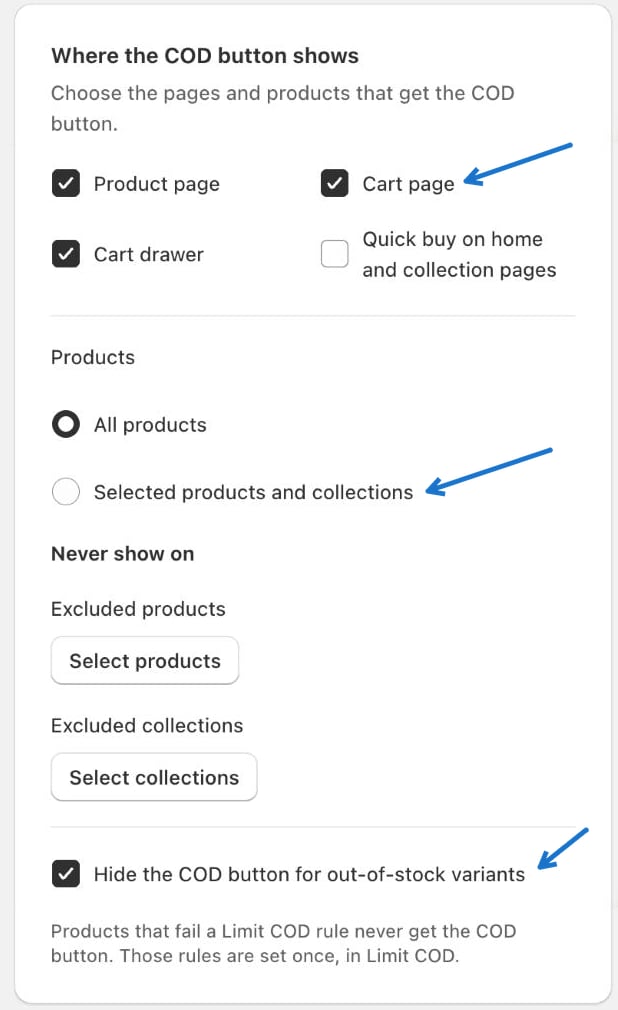
4. Choose where the COD button shows
Under Where the COD button shows, tick the places that should get the COD button:- Product page
- Cart page
- Cart drawer
- Quick buy on home and collection pages
- All products — every product gets the COD button.
- Selected products and collections — only the ones you pick.
5. Choose the countries
Under Countries, search and add the countries where the COD button should appear. Shoppers in other countries get your normal checkout. If no country is selected, the form is available in every country.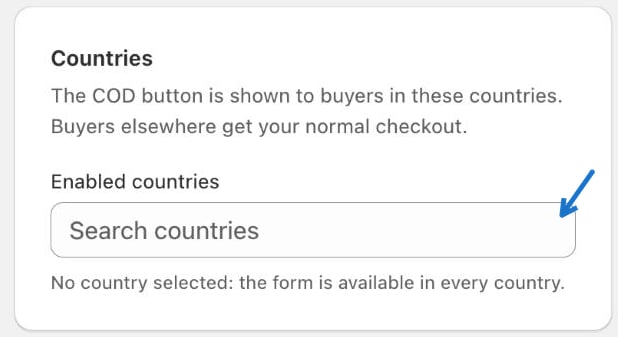
6. Turn on address suggestions
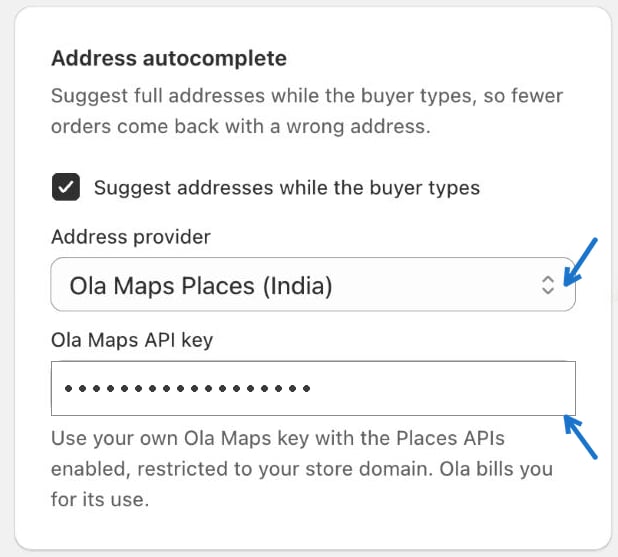
Address autocomplete suggests full addresses while the shopper types, so fewer orders come back with a wrong address. You bring your own key from an address provider, and the provider bills you directly for its use.- Tick Suggest addresses while the buyer types.
- Choose an Address provider: Ola Maps Places (India) or Google Places.
- Paste your provider’s API key into the key field below it.
- Save, then test the form on your store and type a few letters of an address.
Get an Ola Maps API key
Best for stores shipping inside India.- Register for Krutrim Cloud and sign in.
- Open the Developer Portal and go to Credentials.
- Click New Credentials at the top right.
- Enter a name (for example “COD King address suggestions”) and a description.
- Check that the new credential appears in the credentials table, then click its name.
- Copy the API Key from the details page. Ignore the OAuth2 values.
- In the same details page, add your store domains (comma separated, for example
yourstore.com, yourstore.myshopify.com) and click the add button to whitelist them. - Wait a few minutes: Ola activates the credential with its default plan shortly after you create it.
- Back in COD King, choose Ola Maps Places (India), paste the key into Ola Maps API key, and save.
Get a Google Places API key
Best for stores shipping in many countries.- Sign in to the Google Cloud console and create or pick a project.
- Open Billing and link a billing account to the project. Places APIs need billing on.
- Go to APIs & Services → Library, search for Places API (New), and click Enable.
- Go to APIs & Services → Credentials, click Create credentials, and choose API key.
- Click the new key to edit it. Under Application restrictions choose Websites and add your store domains, for example
https://yourstore.com/*andhttps://yourstore.myshopify.com/*. - Under API restrictions choose Restrict key and pick Places API (New) only.
- Save and copy the key.
- Back in COD King, choose Google Places, paste the key, and save.
What your buyer sees
When address suggestions are working, the buyer starts typing in the Address box and a list of matching addresses drops down. Tapping one fills in the street, PIN code and state at once, so the buyer types less and makes fewer mistakes.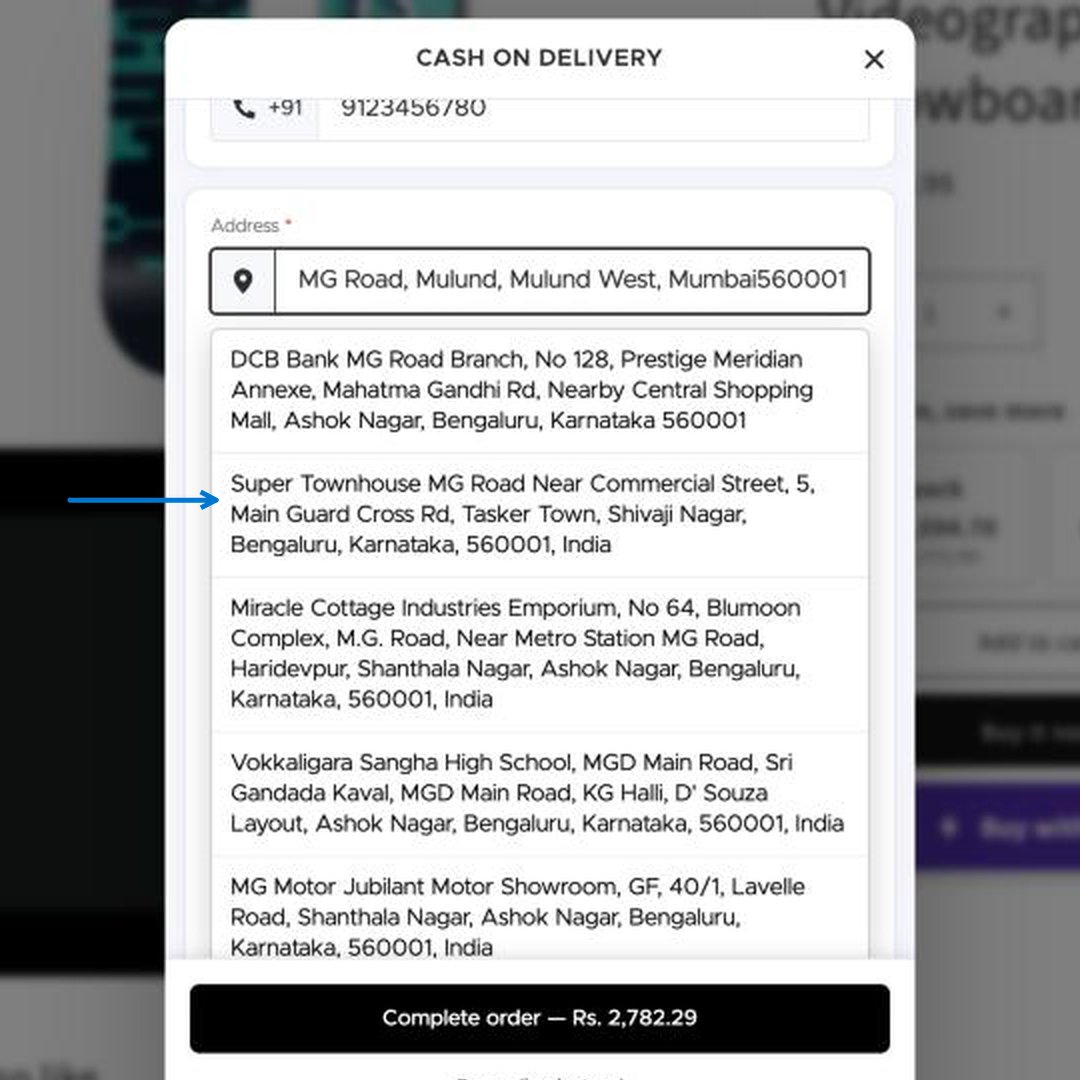
If suggestions do not appear
- The key is wrong or has extra spaces. Paste it again.
- The domain is not whitelisted or restricted correctly. Add both your custom domain and your
myshopify.comdomain. - The provider API is not enabled or billing is off (Google), or the credential is not active yet (Ola).
- The buyer’s country is not in Enabled countries (step 5).
Steps follow the provider docs: Ola Maps authentication and Google Places API keys. Provider consoles change, so labels may differ slightly.
7. Read the Health check
The Health check card lists anything that stops the COD Form from working properly, with an Open button that takes you straight to the page where you can fix it. Below it, Form orders this month shows how many orders the COD Form created in the current calendar month. Test orders and prepaid redirects are not counted.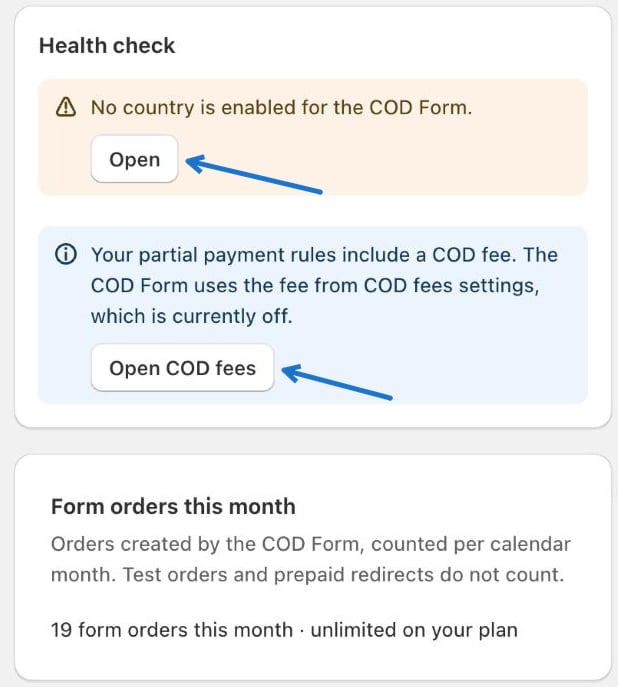
Next: Buttons
Change the text, colours and placement of the COD button.
Fraud protection
Add order limits and block lists before you go live.